3. Verification
Verifying the operation of the FlexiObox installation
After preparation and configuration, it is very important for the installer to check the complete setup.
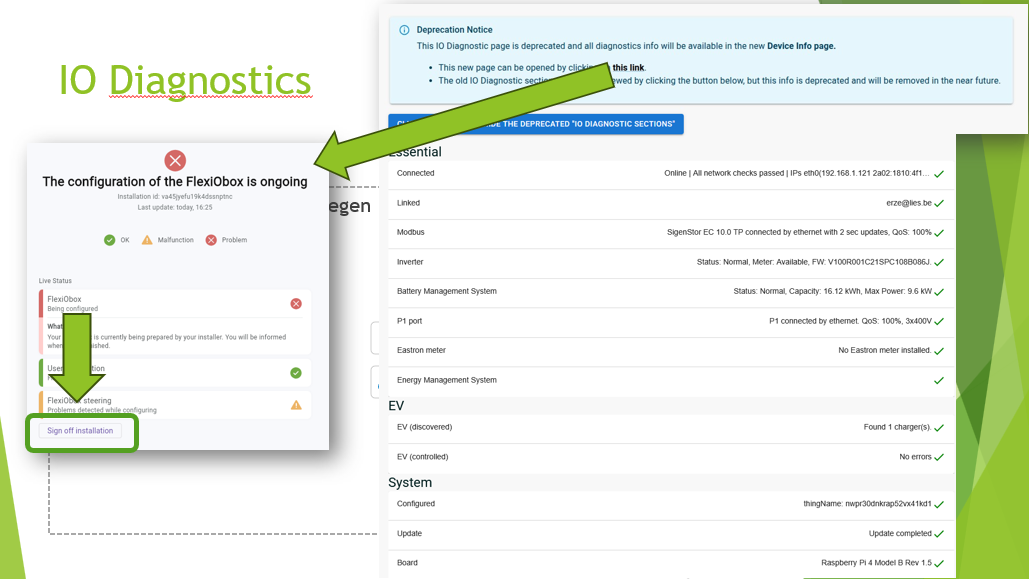
This can be done using the new ‘Device Info page’ that you can find under the ‘IO Diagnostics’ tab.
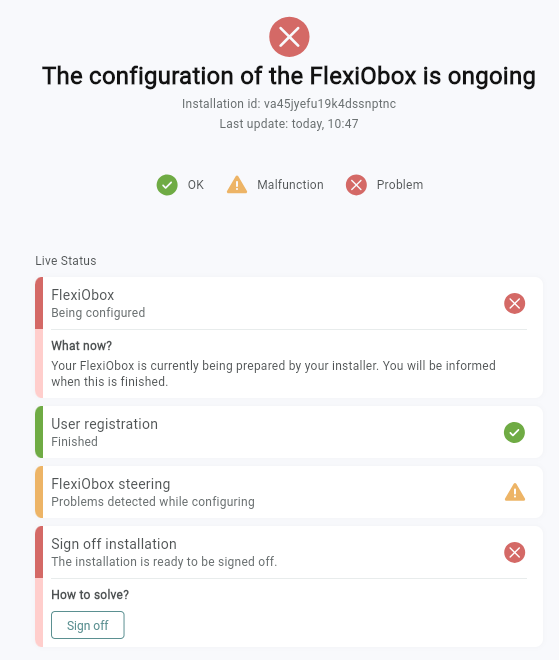
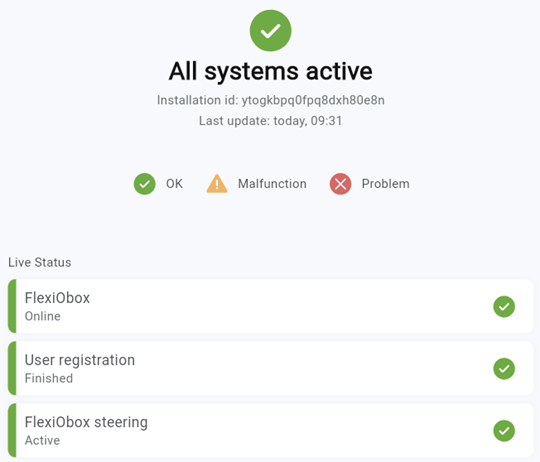
For FlexiO to work correctly, every tab in de device info page (similar to the I/O Diagnostics ✅ ) should be completed before signing off the installation

In this transition stage both the ‘device info page’ and the IO Diagnostics will be shown. We will continue adding new checks in the device info page to make the installation 100% ‘first time right’.
Checks to be performed
You can click on every tab of the ‘device info page’ to see the details. The user can see a compiled view of these tabs. By logging in with your partner account you can check the details and, at the end of the configuration, do the sign off.

Check 1: Connected
Check to be performed | If not ok |
|---|---|
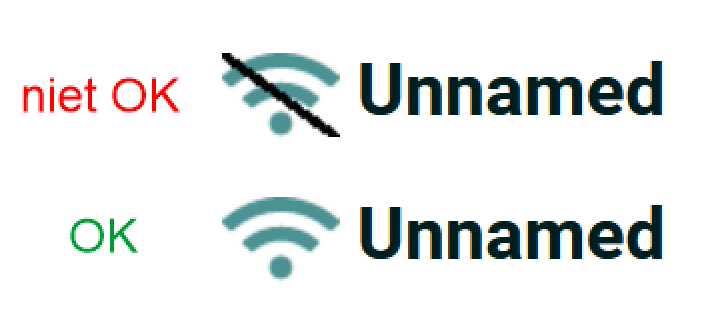
If the FlexiOBox is connected to the Internet and can connect to the LIFEPOWR Cloud, this parameter will be available ✅ .  Example Important: On the FlexiObox, the green LED must also be continuously lit and the connection icon must be active on the web page of this FlexiObox: Green LED  Connection symbool |
Detailed network support can be found here. |
Check 2: Modbus
Check to be performed | If not ok |
|---|---|
For a Modbus TCP inverter, this parameter is set ✅ when the inverter is recognized by FlexiO. The same ✅ for Modbus RTU, if the correct cable has been correctly connected directly from the inverter to the FlexiObox.  Example |
|
Check 3: Linked
Check to be performed | If not ok |
|---|---|
✅ Indicates when the FlexiOBox has been paired with an end user and they have also successfully completed registration.  Example |
|
Check 4: Configured
Check to be performed | If not ok |
|---|---|
If a configuration has been created, this parameter will be set to ✅ "thingName".  Example |
|
Check 5: P1
Check to be performed | If not ok |
|---|---|
If the P1 port of the digital meter has been connected, this parameter will be ✅ present when FlexiO receives the meter data. This applies to both wired and wireless P1 connections.  Voorbeeld |
|
Check 6: Battery Management System (BMS)
Check to be performed | If not ok |
|---|---|
✅ when there is a connection between the inverter and the battery BMS.  Example |
|
Check 7: EV
Check to be performed | If not ok |
|---|---|
✅ If a charger has been configured, FlexiO will automatically recognize the selected charger on the network.  Example (no EV) |
|
Check 8: Eastron
Check to be performed | If not ok |
|---|---|
✅ if a HomeWizard Eastron meter is set in the settings and FlexiO automatically recognizes it (as expected).  Example (not installed) |
|

Finalizing checks
All tabs in the Device Info page need to be completed. When a problem occurs, you can find the details in the same tab with a link to the documentation.
If the above diagnostics are not solved (not checked ✅ ), please refer to the installation and training documentation on our platform or contact our technical help desk.
Next section: Activating FlexiO
When all diagnostic errors have been resolved, you can proceed to the last step. 4. FlexiO activeren