
1a. Detailed config of the FlexiObox
Procedure for configuring the FlexiObox using the Device Details page
Use this guideline to carry out a detailed configuration of the FlexiObox.
A LIFEPOWR installer login is required to configure a FlexiObox.
The FlexiO installer website also allows you to monitor and manage all your FlexiO installations.
No installer login yet? Read this section how to obtain.
Legend: ☑️ automatically set - do not change 🏅 expert setting |
Roadmap
Step 1: FlexiObox name as pre-config
Make sure the FlexiObox is online
If you have just successfully activated the FlexiObox (claim), you can open the Device Details page by clicking the appropriate button in the Claim Device popup.
Don't have the Claim Device popup open anymore?
Go to the appropriate FlexiObox in your overview list and open the page.
You can find the FlexiObox via the reference you entered on the claim page.

First, enter a name for the FlexiObox.
Click on the pencil icon next to UNNAMED.
A new pop-up window opens where you can enter the name of the FlexiObox.
The name you enter here will also be visible to the end user in the MyFlexiO application.
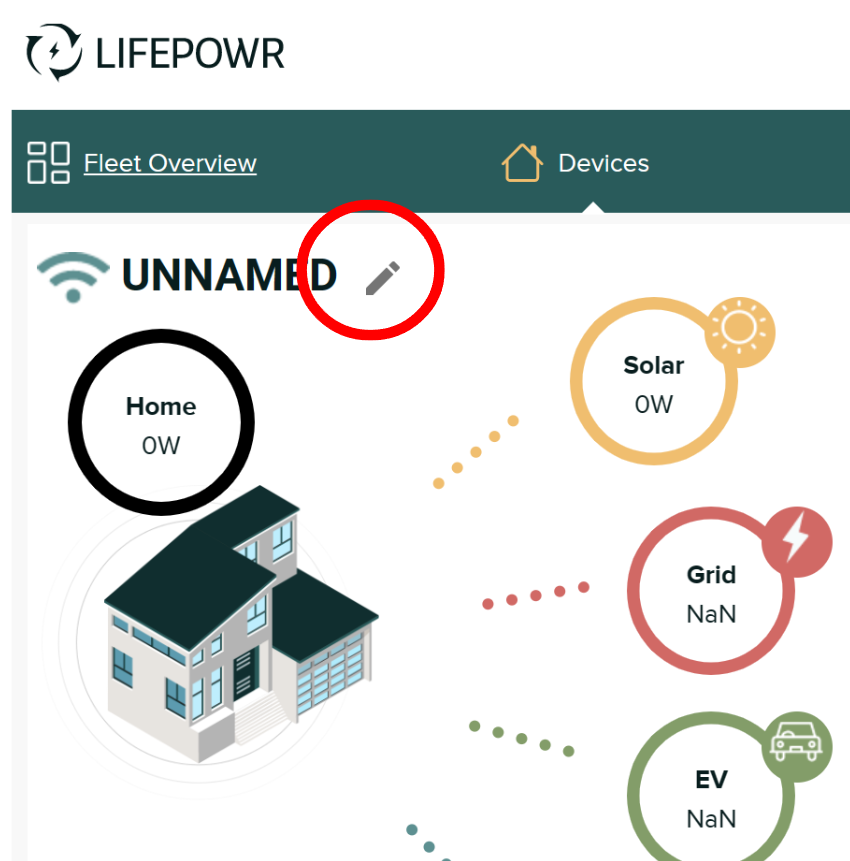
Click the pencil icon

Popup with the default name
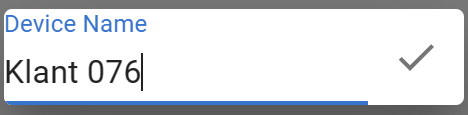
Customise the name and click ✔️
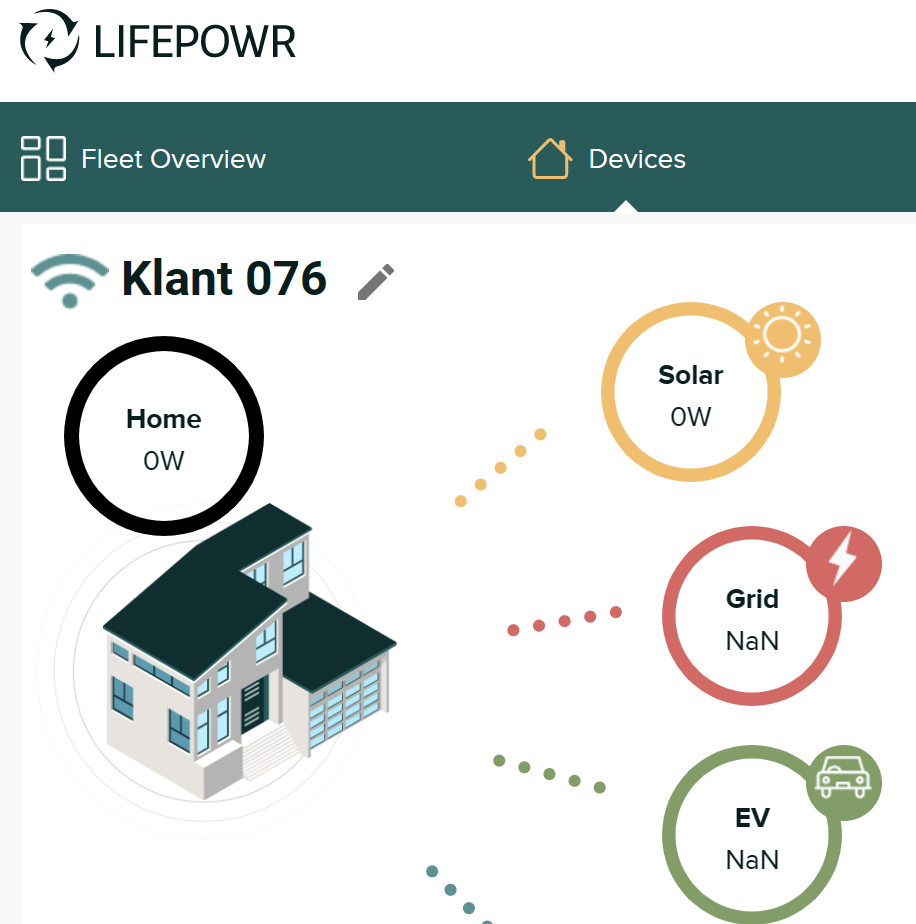
Result
Step 2: Before You Get Started
After activation (claim), the upgrade process will automatically reboot the FlexiObox.
This update and reboot may take 10 to 15 minutes depending on the network speed.
During the reboot, the FlexiObox is temporarily not configurable.
You can monitor the update status in the middle of the IO Diagnostics page, if desired:
Energy Management System = Fake Ems
Update installation progress - nn%.

Update is performed
The update has ended successfully when the FlexiObox has been rebooted and:
Energy Management System = ✅
Update = Update completed ✅
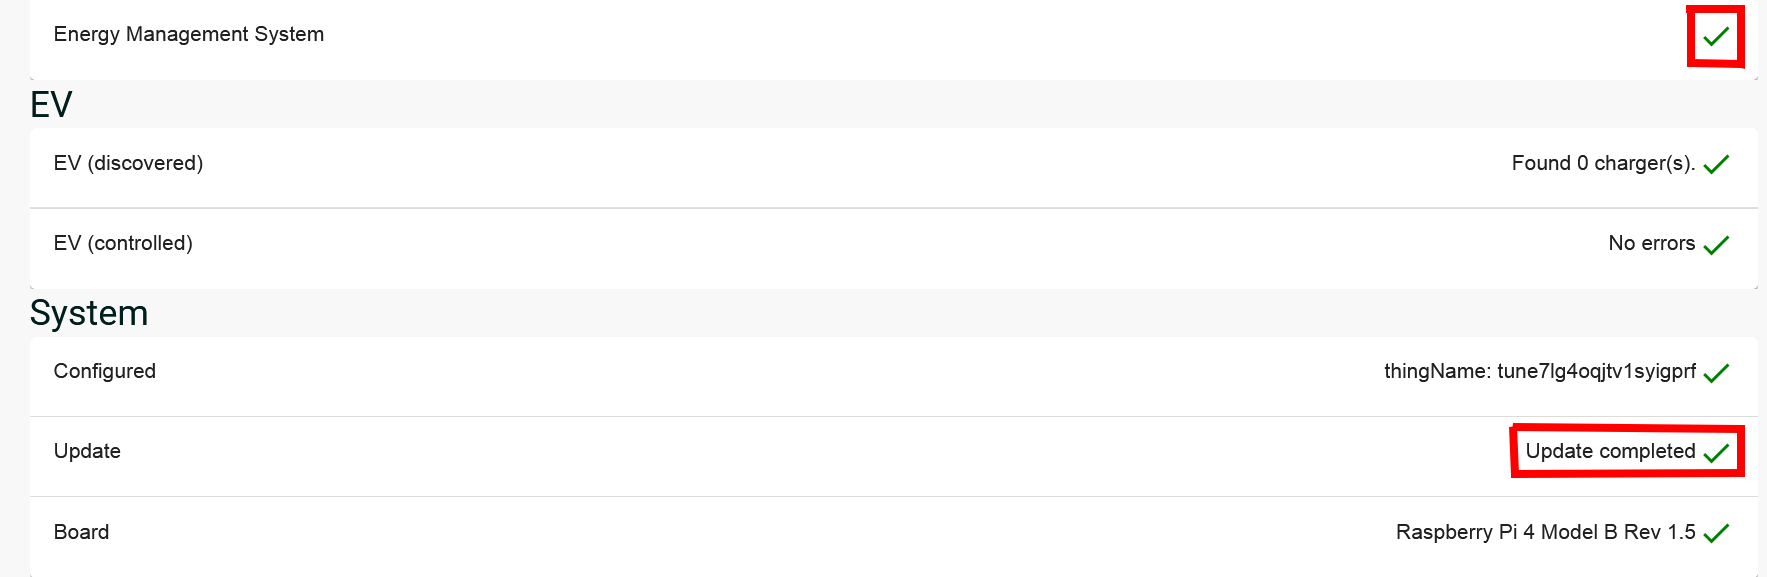
Update ready
Step 3: Link end-user account
Click on "Link account" and enter the correct e-mail address of the end user.
use the email address which the user is already registered in the MyFlexiO app.
oruse the email address which the user has not yet registered in the MyFlexiO app.
Save these details.
The user will receive a welcome email with instructions to activate the P1 port, check the energy tariff and check the MyFlexiO app. All information is available on the Welcome to FlexiO page.
Depending on the way you work, this link can be set in advance (allowing time for the customer time to create an account and activate P1 before the FlexiObox is installed) or after the FlexiObox has been properly delivered. Don't forget to do it though, because full control, including grid balancing, requires a user account!
The icon indicates the registration status:
 No email address linked yet
 Email address linked, but no MyFlexiO account created yet. Is there an error in the mail address?
 Email address linked and MyFlexiO account created
STEP 4: EAN
The EAN code of the electricity meter is necessary to enable grid balancing.
It is recommended that the EAN is entered during this process to assist the user:
If this step is skipped, the user will be prompted to enter the EAN the first time the application is launched, which will significantly complicate or delay the process.
click on Balancing
Enter the EAN code of the electricity meter
Click on Submit
Step 5: Activate EDIT mode
To edit the data, first click NEW CONFIGURATION.
Similarly, activate EDIT mode later if you want to change anything else.
All fields are now customisable.
It is not a bad practice to periodically save the modified data during configuration by clicking SUBMIT. Immediately afterwards, you can re-enter EDIT mode as described above. This way you can be sure that you won't lose the data due to an automatic reboot, as mentioned above.
Step 6: Address of installation
Enter address details.
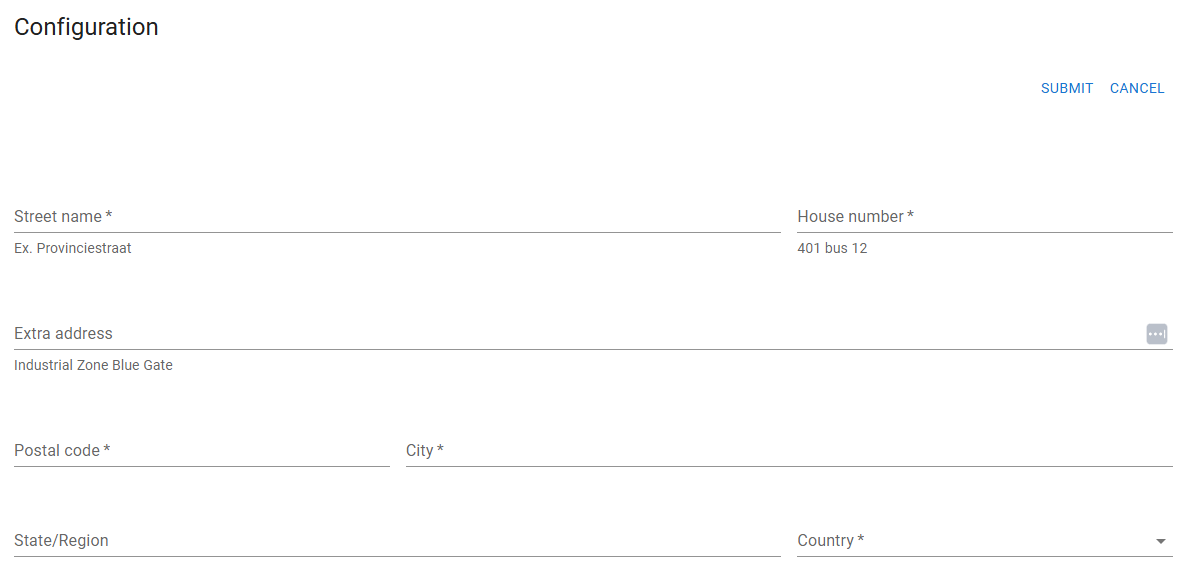
Address details to be filled in
FlexiO uses this data to determine local weather forecasts to calculate expected local solar production.
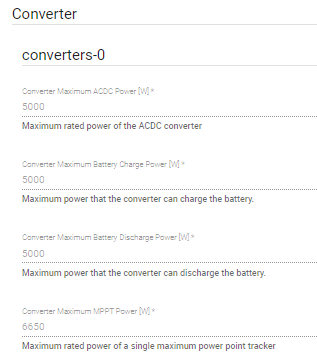
Step 7: Inverter
First select the brand of the inverter and then the model.
Only FlexiO compatible inverters are displayed.
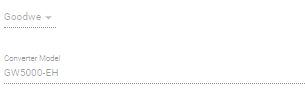
Select inverter brand and model
Based on the above selection, FlexiO will select the technical specifications of the system. Please DO NOT change these details as they may affect the functionality of the system.
☑️ automatically set - do not change
Automatic completion
For an EV-only setup (i.e., no inverter with battery), you must first select any brand of inverter, then select Custom as the model, and then change the brand back to No inverter.


Step 8: PV panels (hybrid)
PV Panels = Newly installed solar panels connected to a hybrid inverter to which the battery is also connected. For Retrofit Panels, continue to step 9.
More information on PV panels can be found here.
A pvArray is a group of solar panels with the same orientation and inclination.
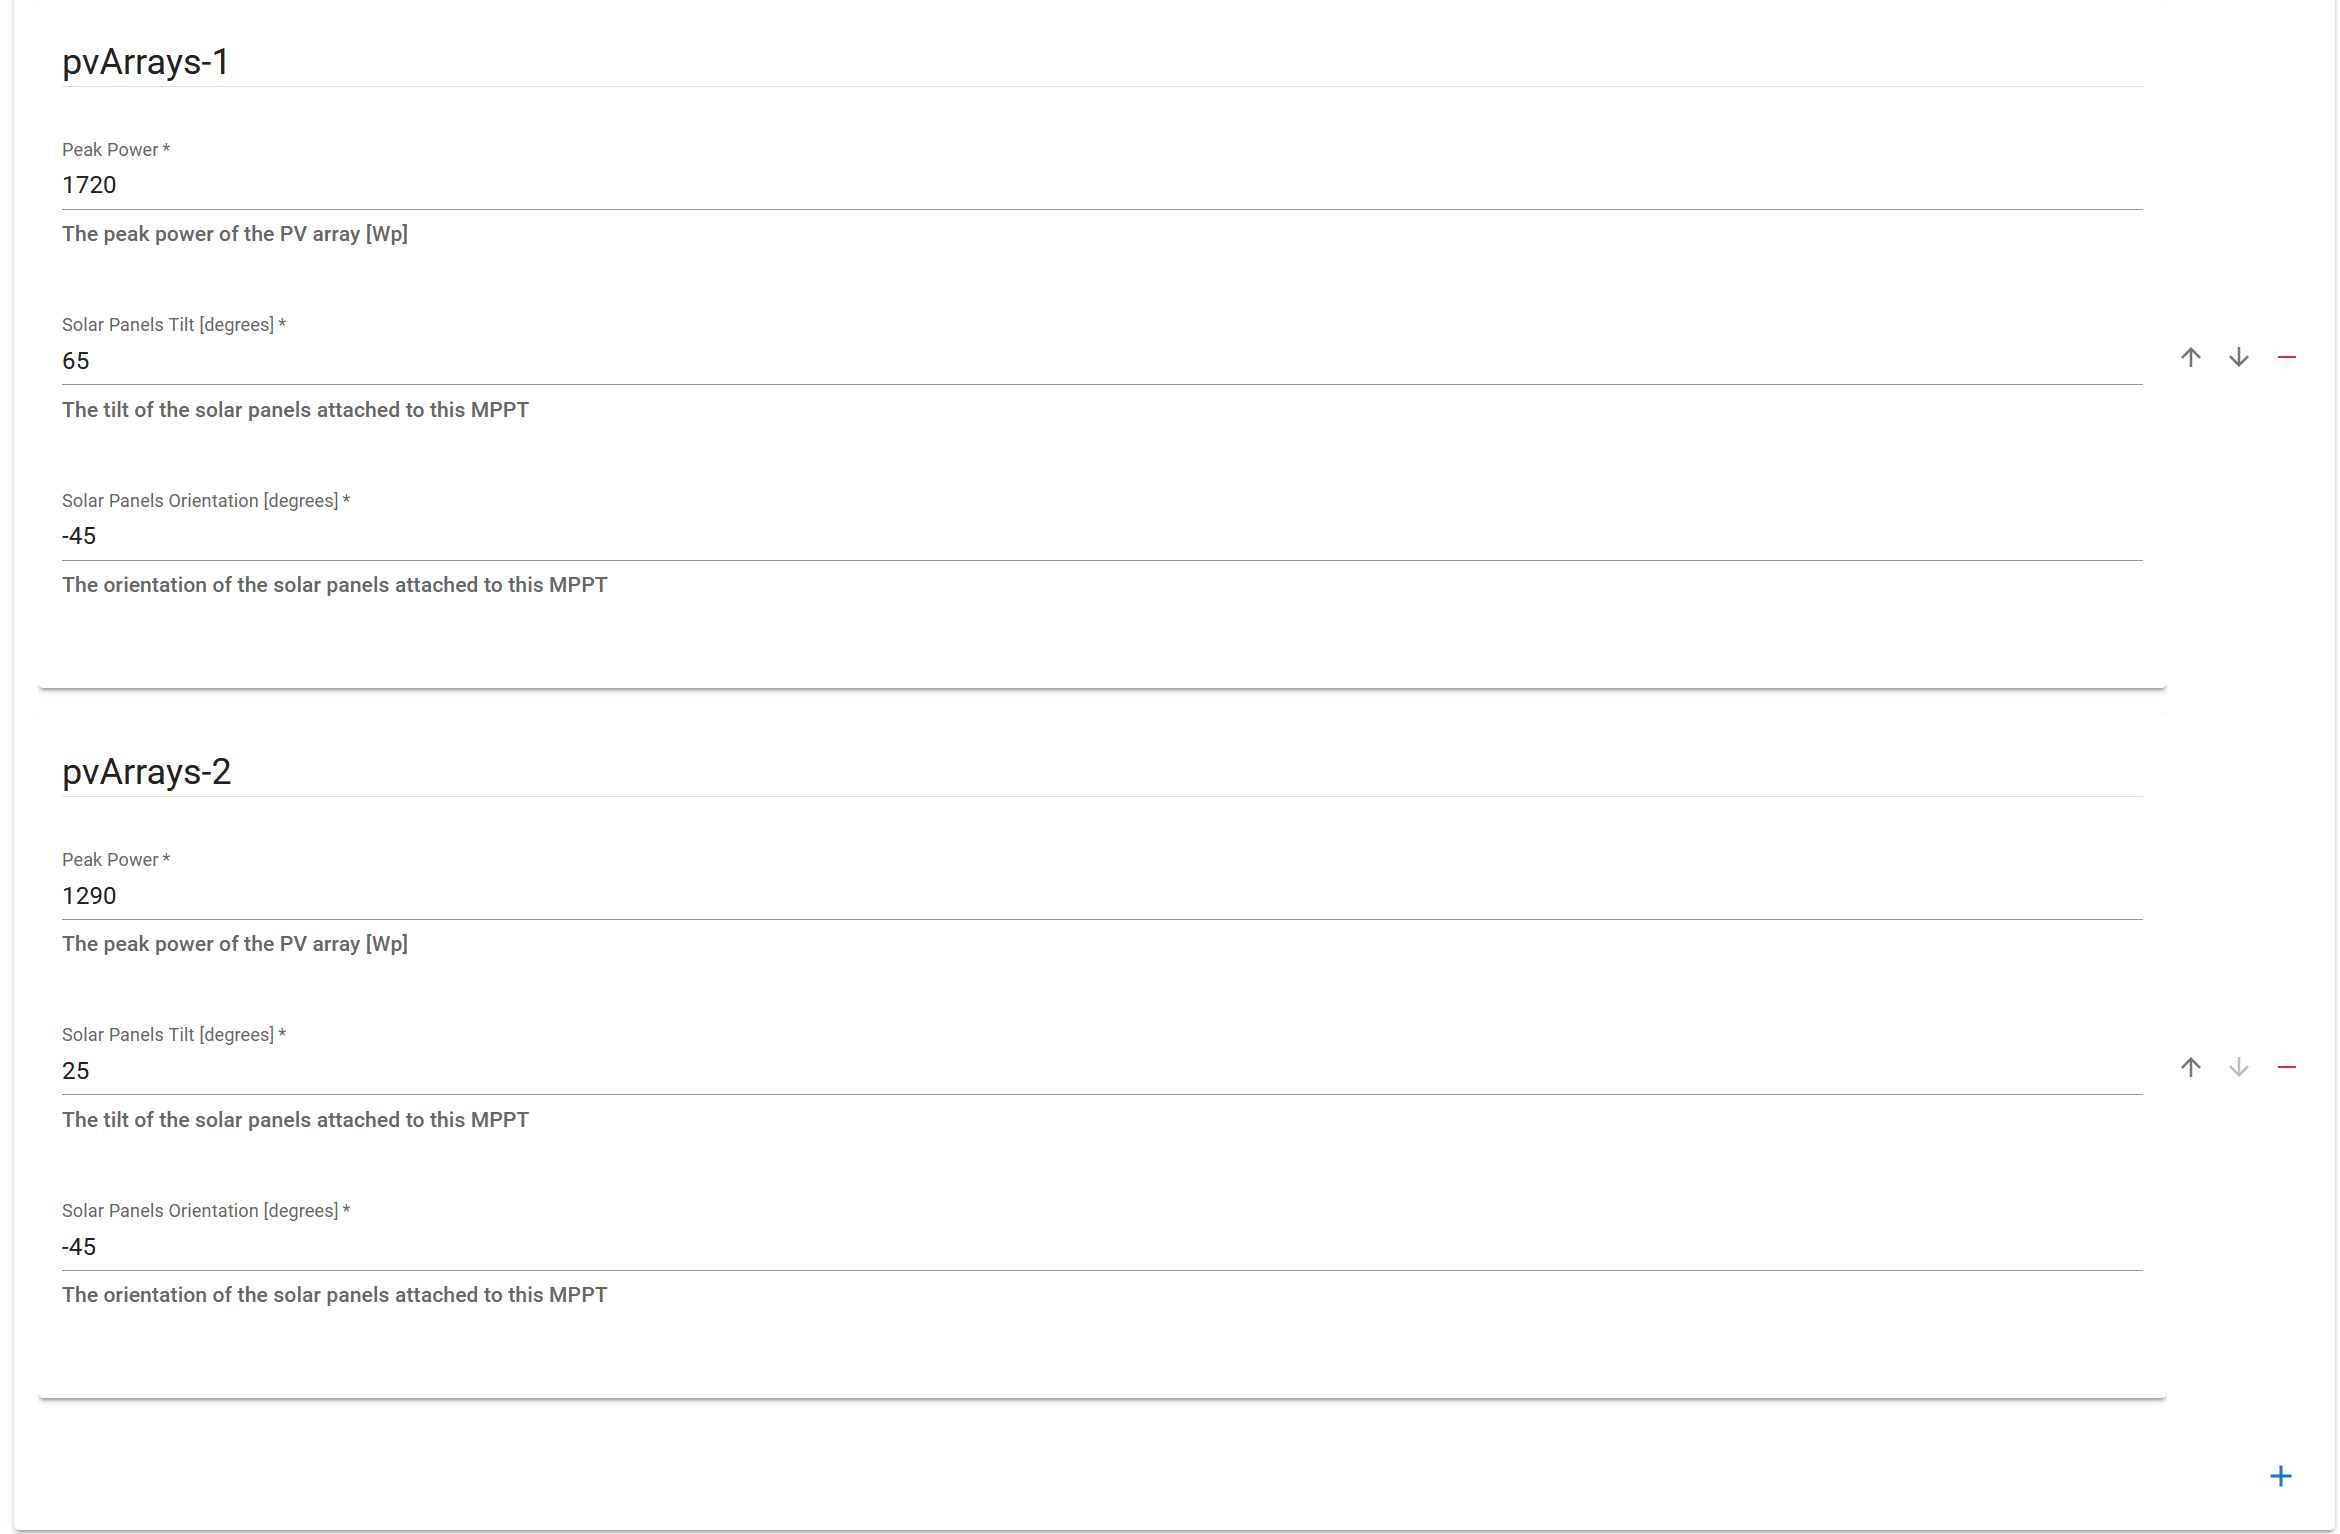
Example of multiple roof surfaces for PV panels
Explanation:
Peak Power | The total power in Watt peak per roof surface. You don't need to consider the physical strings or optimiser configuration. Example: 20 panels of 400 Wp per panel = 8000 Wp |
Solar Panels Tilt [degrees] | Slope in degrees of the roof / solar panels. Example:
|
Solar Panels Orientation [degrees] | Orientation of solar panels (N-O-Z-W). Example:
or any other intermediate value as an integer between -180 and 180. gradation scale is not the same as that of a compass! |
If you have multiple configurations with different layouts (e.g., east-west installations), enter each plane separately. You can create an additional roof plane by clicking the "+" and repeating the exercise.
Step 9: Battery
Select brand and model from the dropdown list.
Can't find the battery you want to install in this list? Then you can register it through the ticket system. Provide the make, model and capacity of the battery and LIFEPOWR will ensure it is added after a brief analysis.
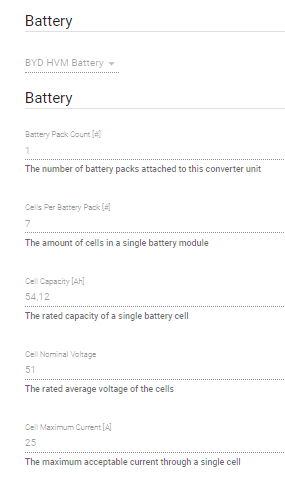
Example of battery selection
Explanation:
For HIGH voltage batteries: | |
|---|---|
Battery Pack Count [#] | The number of battery towers. |
Cells Per Battery Pack [#] | The number of battery modules per tower. |
For LOW voltage batteries: | (the opposite of HIGH voltage) |
|---|---|
Battery Pack Count [#] | The number of battery modules per tower. |
Cells Per Battery Pack [#] | The number of battery towers. |
Based on the above selection, FlexiO will automatically fill in the remaining technical values.
Do not change them.
Cell capacity [Ah] | ☑️ automatically set - do not change |
Cell Nominal Voltage | ☑️ automatically set - do not change |
Cell Maximum Current [A] | ☑️ automatically set - do not change |
Huawei
Attention! Specific for HUAWEI configuration:
Never combine FlexiObox together with Huawei Emma configuration, they are not compatible
Make sure the Huawei Luna 2000 S1 is directly connected by wire to the internet
When configuring the Huawei Luna 2000 S0 battery, make sure that a built-in DC-DC inverter turns paired batteries back into 1 battery.
Select Huawei Luna 2000 S0 Single phase battery if a single-phase inverter is used.
Battery Pack Count [#] | 1 (as a fixed value) |
|---|---|
Cells Per Battery Pack [#] | 1 (as a fixed value) |
Cell capacity [Ah] | Amount of modules * 11,11 [Ah] |
Cell Nominal Voltage ☑️ automatically set - do not change
Cell Maximum Current [A] ☑️ automatically set - do not change
Example:

10 kWh battery (2 modules):
2 x 11,11 Ah = 22,22 Ah
Select Huawei Luna 2000 S0 Three phase battery if a three-phase inverter is used.
Battery Pack Count [#] | 1 (as a fixed value) |
|---|---|
Cells Per Battery Pack [#] | 1 (as a fixed value) |
Cell capacity [Ah] | Amount of modules * [Ah] of a single module |
Cell Nominal Voltage ☑️ automatically set - do not change
Cell Maximum Current [A] ☑️ automatically set - do not change
Example:
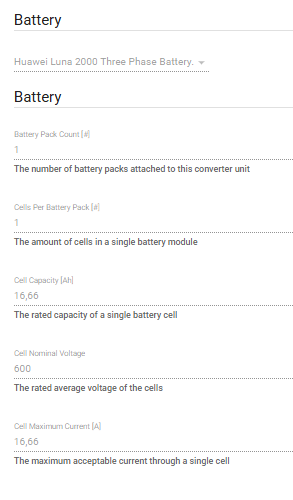
10 kWh battery (2 modules):
2 x 8,33 Ah = 16,66 Ah
Always connect the Huawei Luna 2000 S1 battery to the local network using a wired network cable directly connected to the modem!
Select Huawei Luna 2000 S1 Single phase battery if a single-phase inverter is used.
Battery Pack Count [#] | Total amount of battery modules |
Cells Per Battery Pack [#] | 1 (as a fixed value) |
Cell Nominal Voltage ☑️ automatically set - do not change
Cell Maximum Current [A] ☑️ automatically set - do not change
Example:
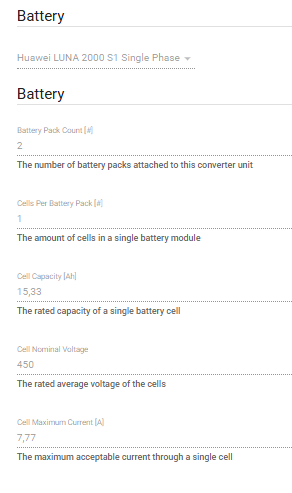
13,8 kWh battery (2 modules)
Select Huawei Luna 2000 S1 Three phase battery if a three-phase inverter is used.
Battery Pack Count [#] | Total amount of battery modules |
Cells Per Battery Pack [#] | 1 (as a fixed value) |
Cell Nominal Voltage ☑️ automatically set - do not change
Cell Maximum Current [A] ☑️ automatically set - do not change
Example:
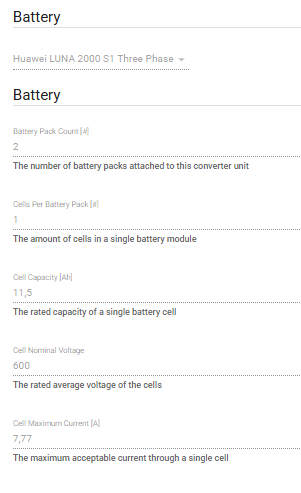
13,8 kWh battery (2 modules)
Step 10: Retrofit panels
Retrofit Panels = existing solar panels operating with their own inverter. The battery was then added to a proprietary retrofit battery inverter.
You can find more explanations about solar panels here:Zonnepanelen details
A pvArray is a group of solar panels with the same orientation and inclination.
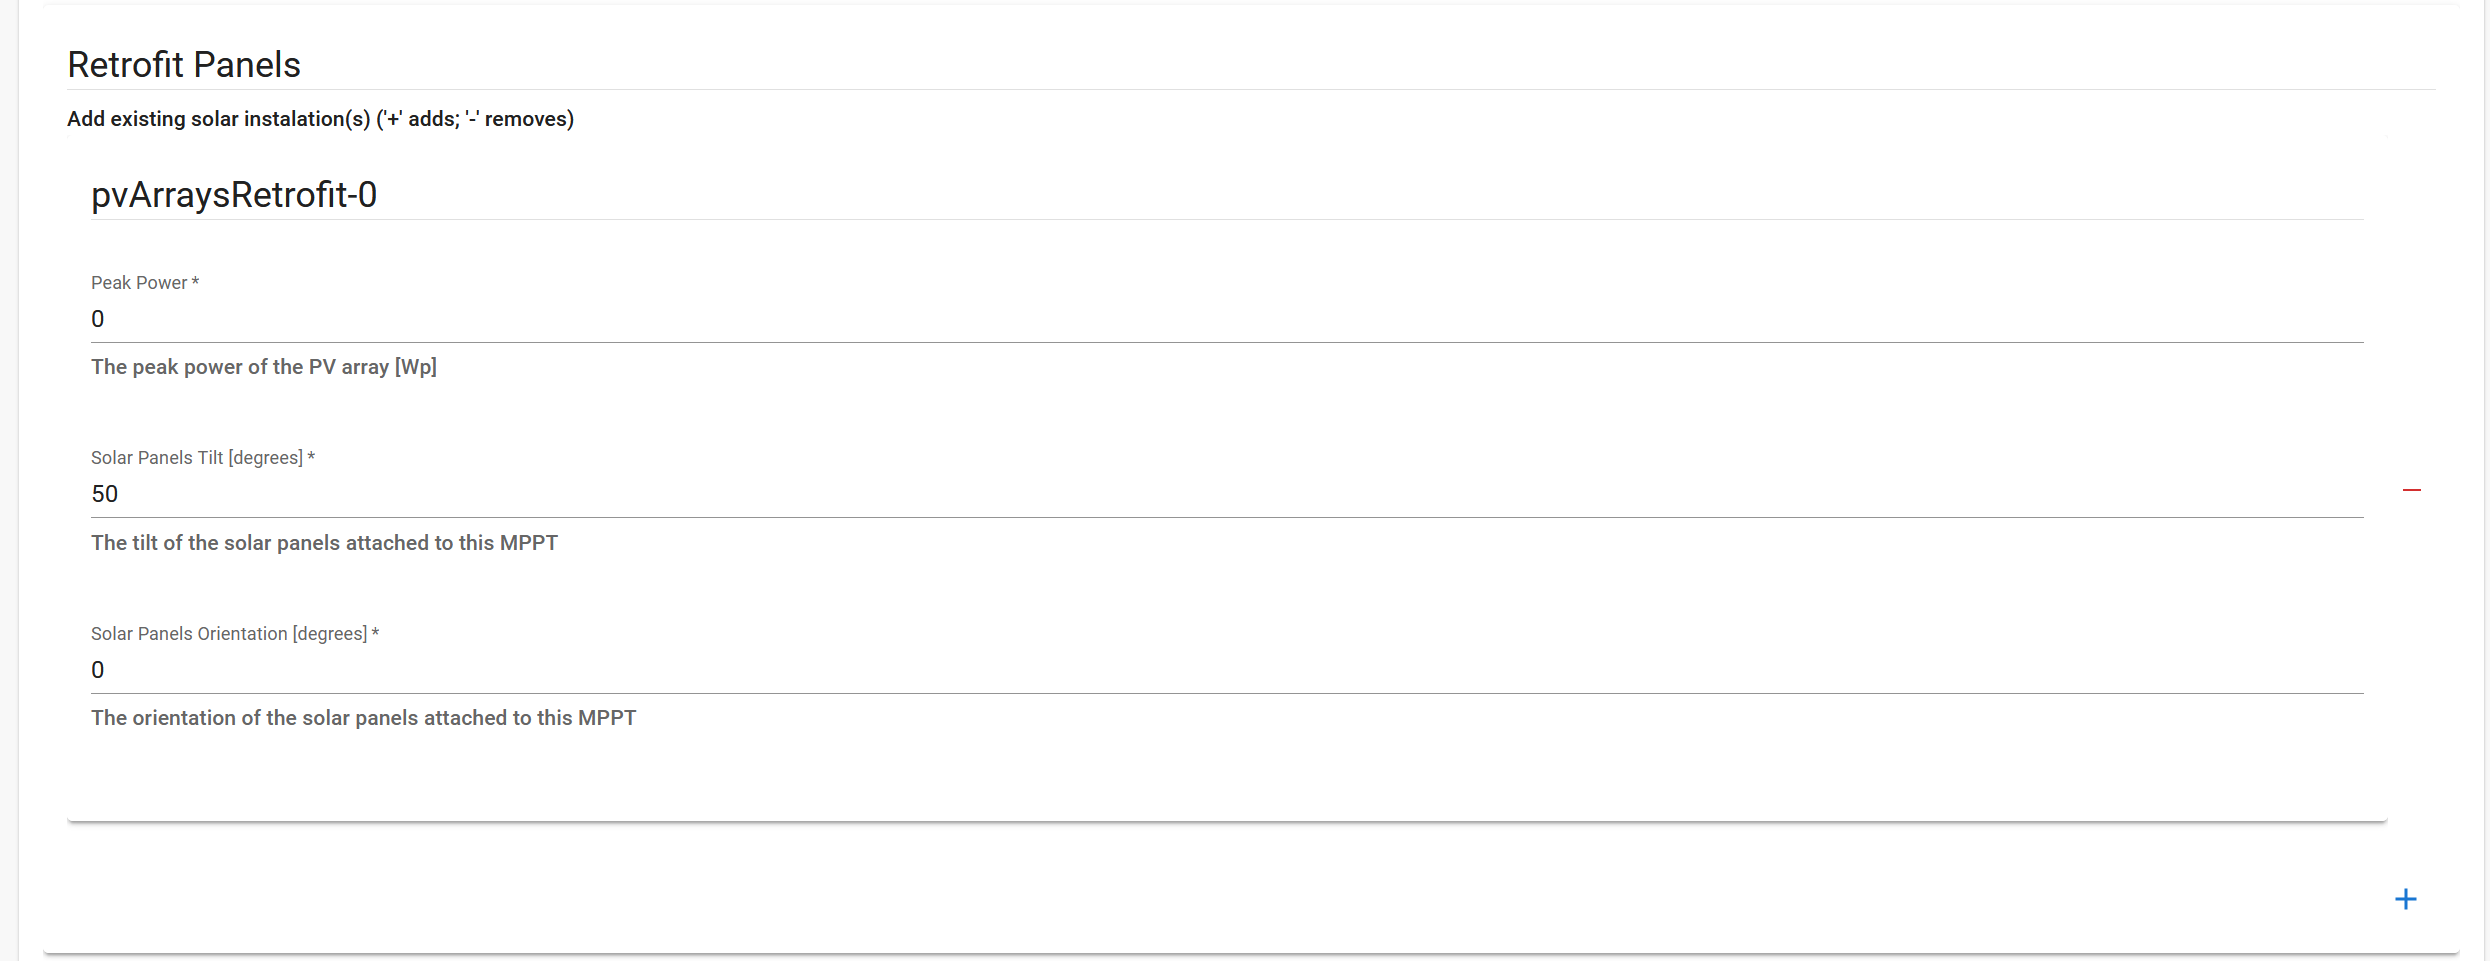
Example of multiple roof surfaces for Retrofit panels
Explanation:
Peak Power | The total power in Watt peak per roof surface. You don't need to consider the physical strings or optimiser configuration. Example: 20 panels of 400 Wp per panel = 8000 Wp |
Solar Panels Tilt [degrees] | Slope in degrees of the roof / solar panels. Example:
|
Solar Panels Orientation [degrees] | Orientation of solar panels (N-O-Z-W). Example:
or any other intermediate value as an integer between -180 and 180. gradation scale is not the same as that of a compass! |
Retrofit PV measurement | If there is an existing PV plant (which operates with its own inverter) and its production is measured, this can be indicated here.
Some inverters have the ability to measure an existing PV system (e.g. GoodWe with CT2 terminals), select 'InverterPvRetro'.
When reading the existing PV with the Homewizard Eastron meter, select this value. Don't forget to activate the API in the HomeWizard app: Instructions
|
If you have multiple configurations with different layouts (e.g., east-west installations), enter each plane separately. You can create an additional roof plane by clicking the "+" and repeating the exercise.
Step 11: Tariff Structure
It is important to choose the right tariff structure, as this is an essential parameter to obtain the desired FlexiO behavior.
Select the tariff to apply from the drop-down list:
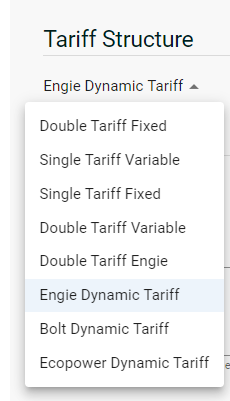
Tariffs in FlexiO
Explanation:
Fixed | In case of Single Tariff Fixed or Double Tariff Fixed, the energy price (price excluding taxes, network costs, fees) MUST be entered manually in €/kWh. If your client's exact rate card is not known, select 'Variable'. |
Variable | FlexiO applies an average market price. |
Dynamic [leverancier] | The FlexiO algorithms include the energy supplier's import and export formula conditions. |
Other tariff settings | |
|---|---|
Double Tariff Variant | Daily rate if applicable:
|
VAT | Indicate here the VAT regime enjoyed by the end user. This is necessary for FlexiO to correctly calculate the added value of FlexiO use. |
DSO | Indicate here which distribution system operator the end user has, which can be found via the VREG website. |
Step 12: Additional parameters
Do not skip this step.
There are a lot of important things to set that are necessary for FlexiO to work properly.
Parameter | Explanation or setting |
|---|---|
Has Digital Meter | Enabled by default. Disable only if you have an analog meter and there is no prospect of installing a digital meter. |
Has P1 port | If the P1 port is connected and activated, tick this checkbox. Enabled automatically when P1 measurement detected by FlexiO. |
Has Eastron Meter | Indicate whether:
|
The inverter has a meter and can work standalone | Should be unchecked if the inverter has a unreliable meter of its own. |
Meter Current Limitation | Indication of the total connected capacity of the electrical installation, given in Amps. Setting the correct value is very important for the proper functioning of FlexiO Example:
Is the value of the main fuse |
Grid connection type | Indication of the number of phases making up the connection (1 or 3 phase):
This value is overwritten when the P1 data is read via the P1 port. |
Injection limit | Max percentage of inverter power allowed to inject into grid. |
Minimum State of Charge (SOC) [%] | The minimum battery level. This is often included in the battery data sheet and may be important for warranty purposes. The value set in the basic settings of the battery inverter is always the Master. FlexiO can therefore never regulate lower than the value set in the battery inverter. |
Maximum State of Charge [%] | The maximum battery level. This is often included in the battery datasheet and may be important for warranty conditions. However, these values are also taken into account by the battery converter, with the values in the battery converter always taking precedence. |
Maximum Reserved State of Charge [%] | Maximum reserved percentage to accommodate peak usage to monitor monthly peak. This value defaults to 20% and is added to the min soc. |
Latitude/Longitude [degrees] | Longitude/Width (geolocation) of the installation. This is automatically determined from the address and should not be adjusted. Used to set the expected PV production according to the weather forecast and the technical characteristics of the entered plant. |
Meter Power Deadband | The smallest possible import or injection grid set point. |
Maximum Generic Load Electricity Price | For use by third-party integrators. |
Enable Three-Phase Load Balancing | Feature may be enabled for Alfen charging stations. Alfen can switch phases without restarting charging session. |
Use Unbiased Estimators | Activate this setting if both Hybrid and Retrofit inverters are present with unmeasured Retrofit solar yield. Especially for installations with both a Hybrid inverter with solar panels and a Retrofit inverter with unmeasured solar output. Please note: solar production via the Retrofit inverter will be calculated and is therefore an estimate. If you wish to obtain exact measurements from the Retrofit panels, install a HomeWizard Eastron meter and make sure this setting is unchecked. |
End of configuration
Be sure to press SUBMIT at the top to save the changes.
After entering the Device details, the FlexiOBox will automatically start checking the entered parameters. If the reality does not match the entered parameters, the FlexiOBox will generate an error code.
Next section: checking
The FlexiObox checks and any error codes can be found on the IO Diagnostics page, which is discussed in the next section.