
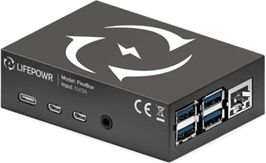
The FlexiObox
The FlexiObox is designed with carefully selected and high-quality tested materials.
The software is developed and tested with the highest precision with a vision to provide sustainability and quality support to our customers.
LIFEPOWR offers 5-year warranty for the FlexiObox.
A LIFEPOWR installer login is required to configure a FlexiObox.
The FlexiO installer website also allows you to monitor and manage all your FlexiO installations.
No installer login yet? Read this section how to obtain.
It is advised to claim and configure the FlexiObox in advance. This ensures a correct claiming and updating of the device before going on site.
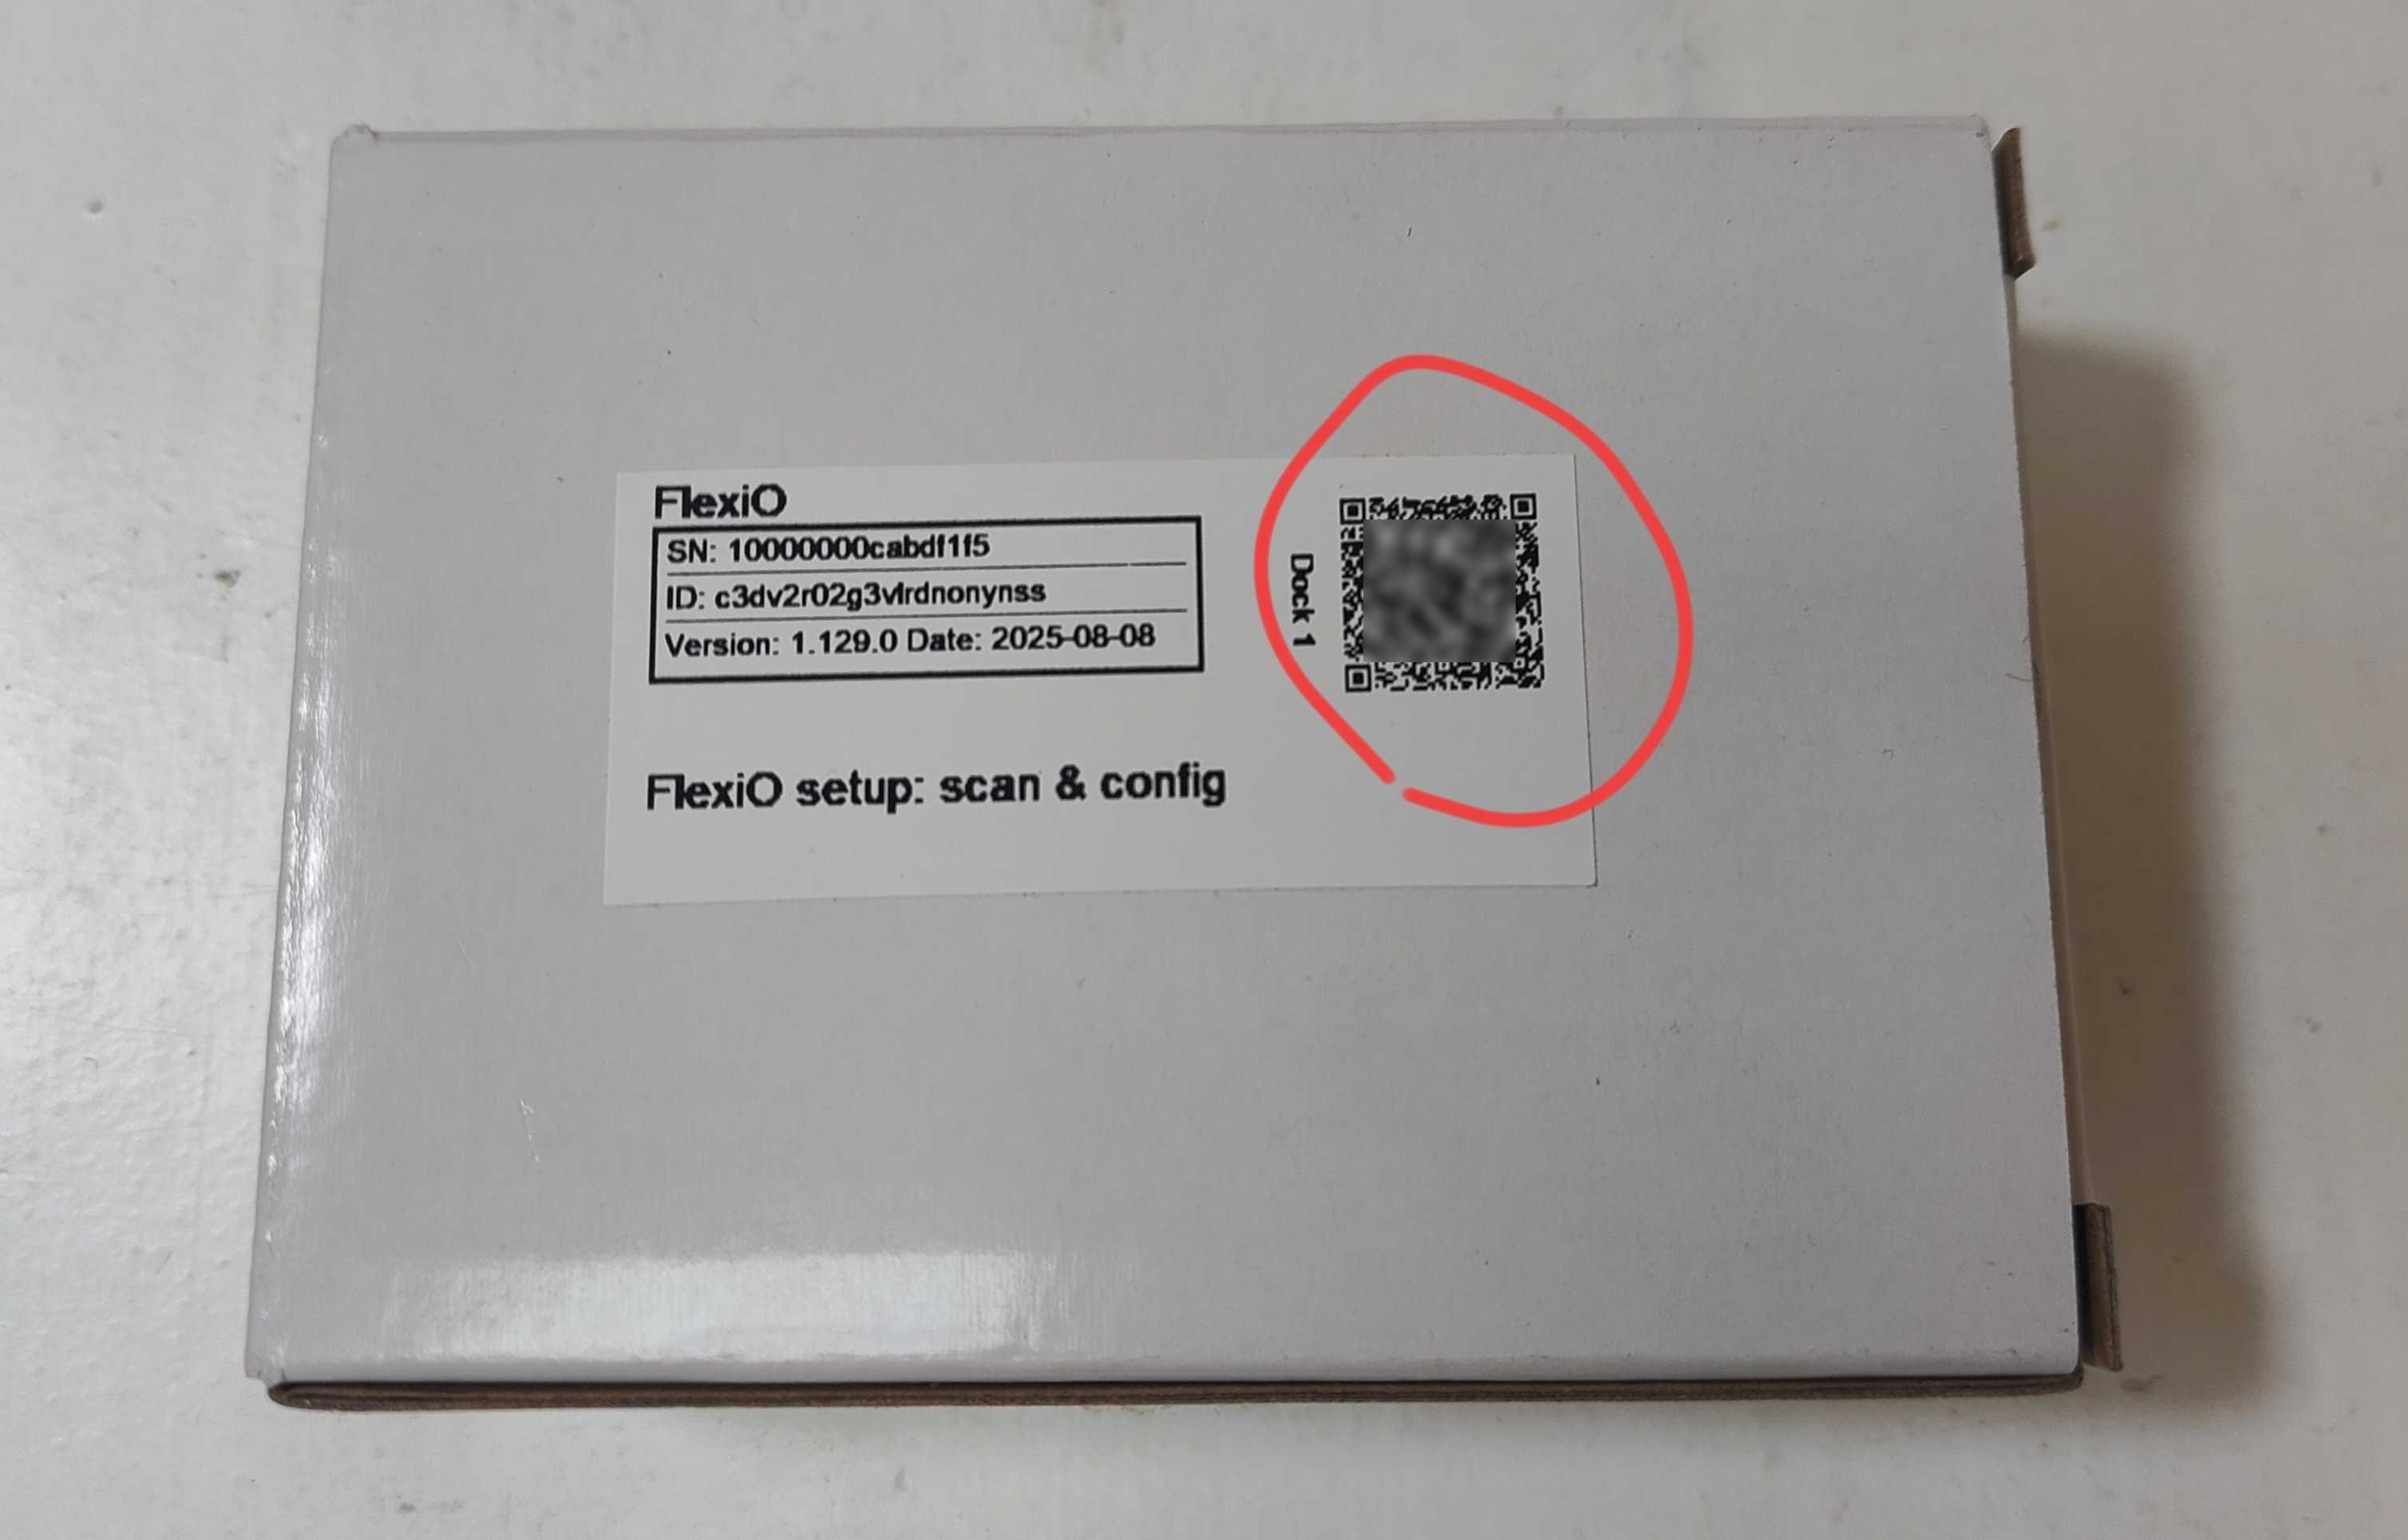
As an alternative it is also possible to do these steps offline by scanning the QR code on the carton pack. Warning: this may result in loss of time and configuring data.
Step 1: Power on the device and connect a serial internet connection
-
Connect the new device to a power supply and an Ethernet (direct internet) connection to the modem
-
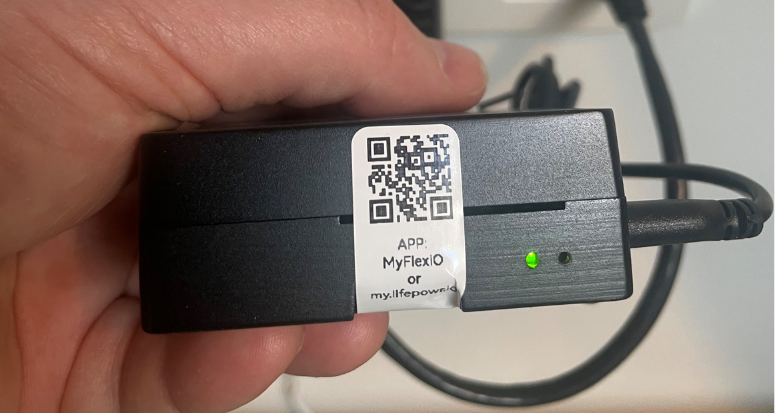
Wait for the device to boot and the green light to be continuous on. More info here.
Step 2: Claiming the FlexiObox
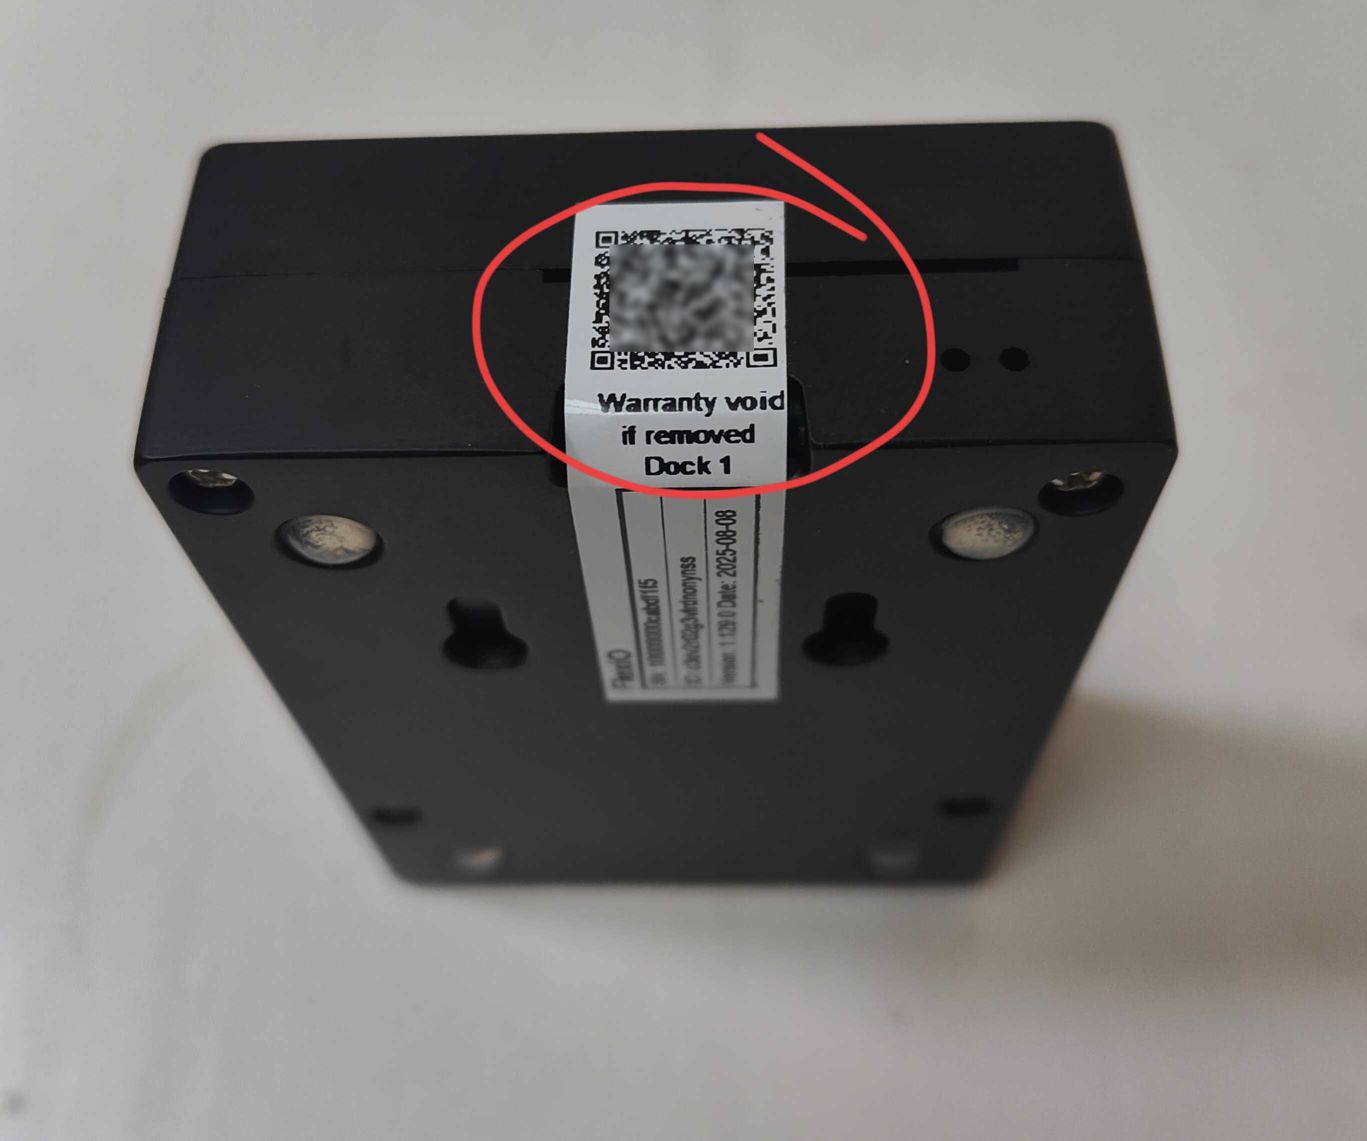
1. Scan the unique QR code
Scan the unique QR code with your mobile device.
The QR code can be found on the carton box or on the FlexiObox
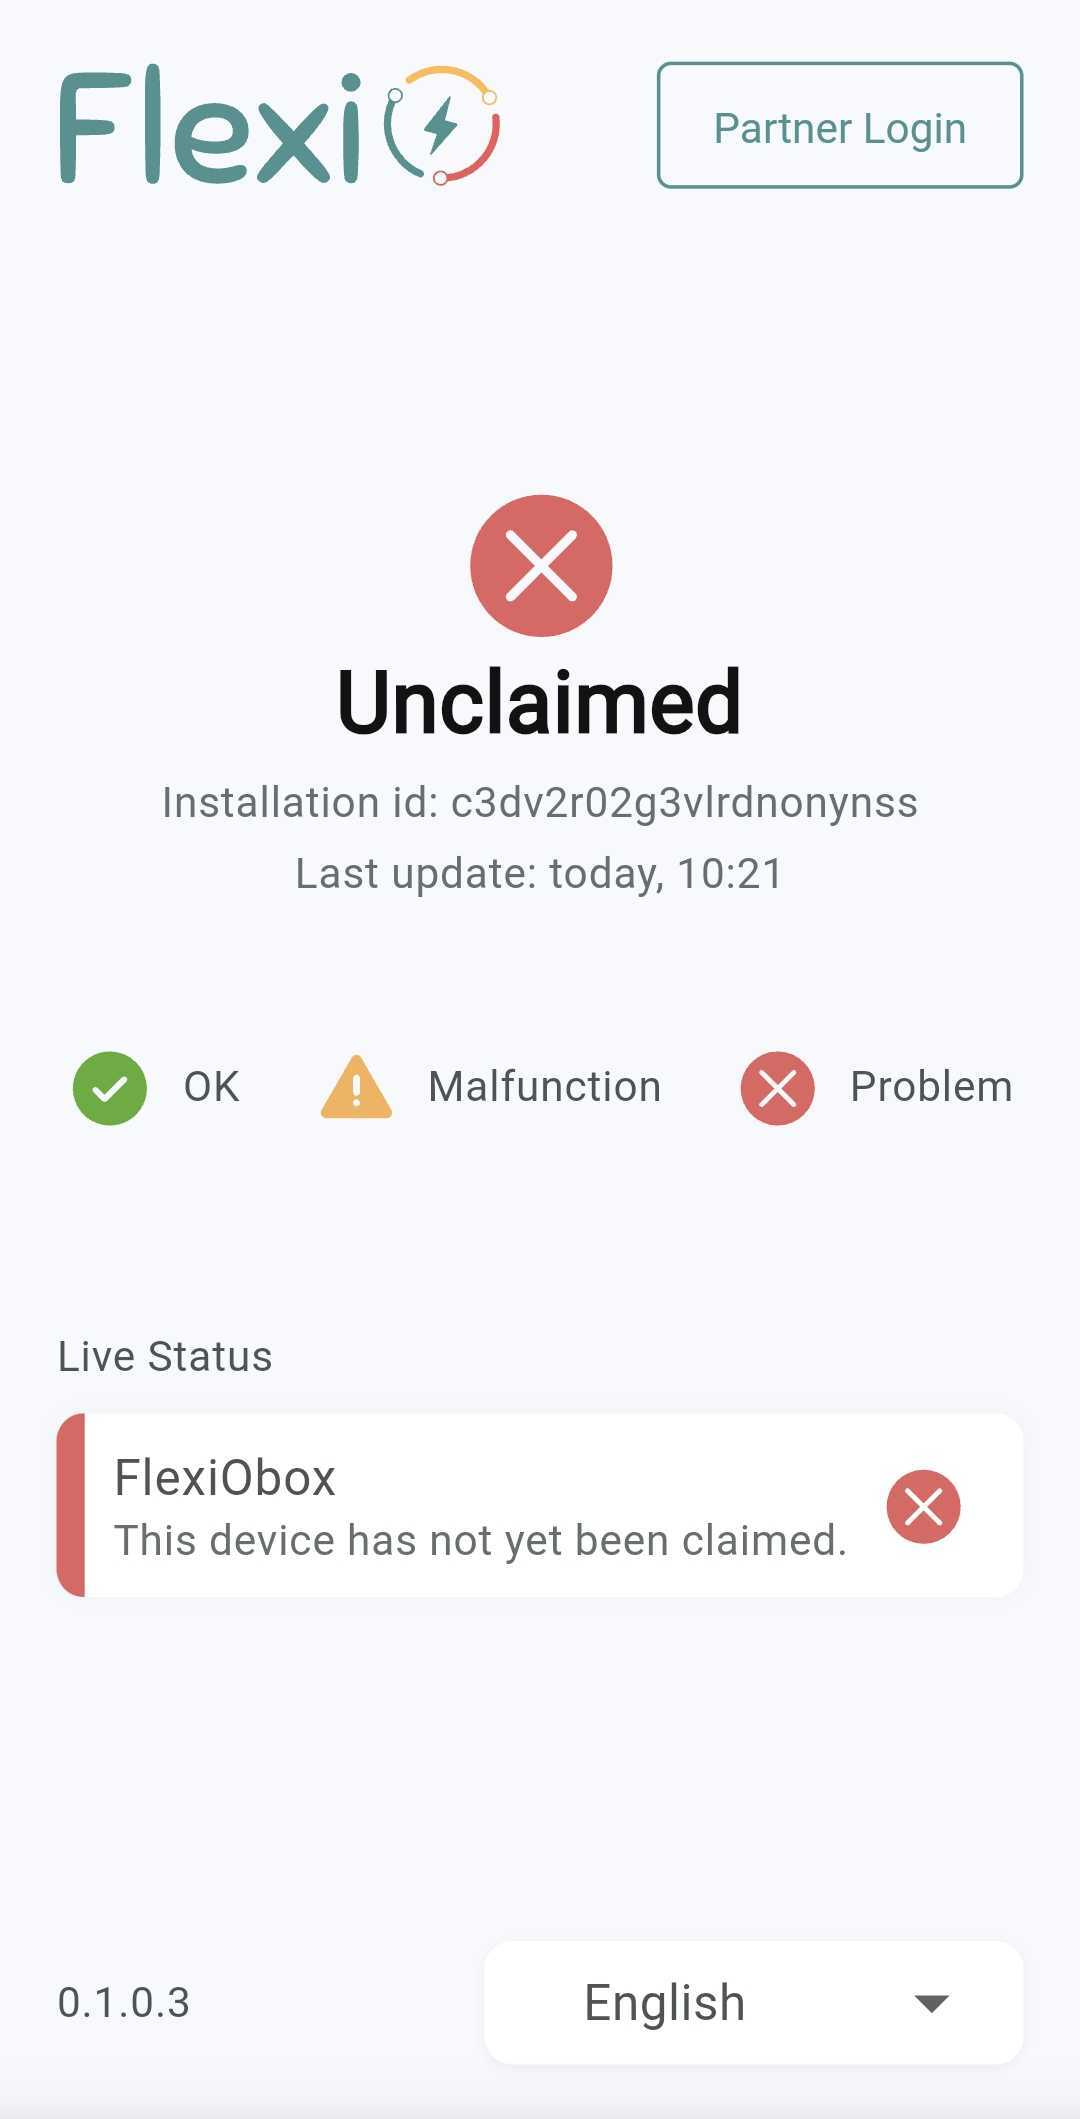
Follow the link of the QR code. A System Health page will appear.
Depending of the status of the FlexiOBox, you might encounter different messages.
2a. Status “Unclaimed”
The status for a new FlexiObox will be “Unclaimed”.
You will need to claim the FlexiObox first before you can configure and activate FlexiO.
Please proceed to 3.
2b. Status of a claimed and/or activated FlexiObox
Status might differ depending on the system’s health.
In case one or more errors are displayed: follow the link for detailed explanation how to solve.

3. Claim a new FlexiObox
If you scan a new device, the status “Unclaimed” will appear.
Depending of your login status, follow the correct step to proceed.
Login with your installer account by clicking at the top right corner “Installer login” to start the guided process:

Device Claim popup appears:
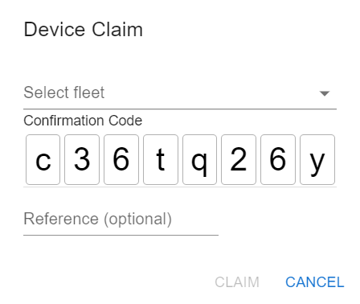
Select the appropriate "Fleet" under which you want to place the FlexiObox.
For normal installer profile only 1 Fleet will be available
Reference (optional): This value is for internal use by the installer only and is not displayed to the end user. You can then manually look up the FlexiObox in your "Fleet" using this value.
Click CLAIM.
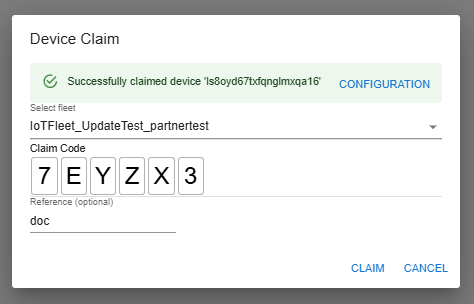
Wait very briefly until ☑️ Successfully claimed device '[device-ID]' appears in a green bar.
If you receive an error message, wait a while and click CLAIM again.
The FlexiObox is now activated in your "Fleet". When the FlexiObox is put online for the first time, it will upload the data and will shortly start downloading the latest software.
After a successfull claim, you can continue by clicking on ‘CONFIGURATION'. You will be redirected to the partner portal.
3.1 Error message: Could not find this device
Due to a recent change in the platform, it is possible you receive an error message ‘Could not find this device!' It is important to wait until this error has disappeared which can take between 5-10 minutes. By refreshing the page you will see if the problem is resolved and can you can start configuring the device. We’re working on resolving this temporary issue as fast as possible.
When the error message is gone, device automatically starts with an update. After the update the device will reboot. You can track the update downloading and installation in the IO Diagnostic - Update
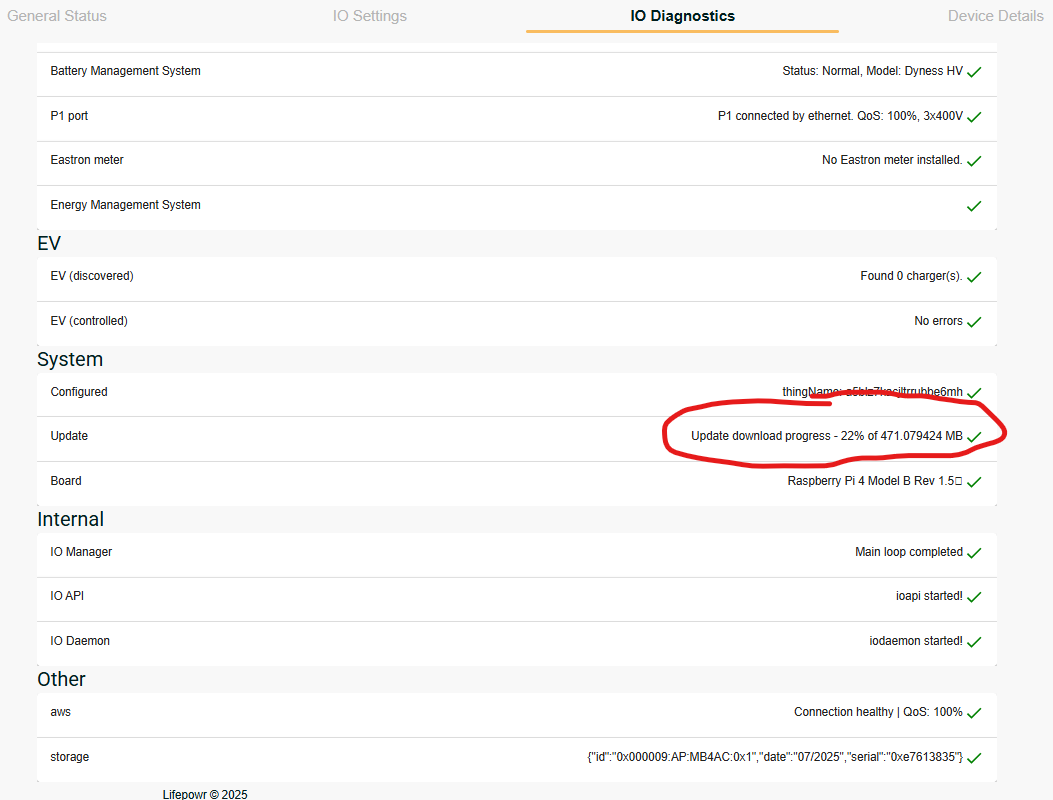
When the update is completed, the system will wait 2 minutes and do a reboot. All configurations that haven’t been submitted when reboot is started, will be lost.
4. Alternative ways to claim a device.
4.1 Using the local network myio.local
You can also claim a new FlexiObox to your fleet using the local network on which the FlexiObox is connected. You can find the instructions here.
4.2 Scan the QR code when device is offline
Scan the unique QR code with your mobile device.
The QR code can be found on the carton box or on the FlexiObox:
Follow the link of the QR code. A System Health page will appear.
Depending of the status of the FlexiOBox, you might encounter different messages.
Step 3: Preparing the FlexiObox for physical installation
-
Make sure at least 1 free 230V power socket is available for powering the FlexiObox.
-
Provide a wired internet connection (RJ45 connector) to this location:
-
Connected directly to the internet provider's modem
-
Cable and connector UTP Cat6 or higher preferred
-
-
The FlexiObox Wall Mount is sold separately and strongly recommended for a clean wall mount of the FlexiObox.
If you do not use a Wall Mount and rather use screws instead, make sure the screws are screwed in deep enough for avoiding risk of damaging the FlexiObox on the inside.
Follow steps below to prepare the FlexiObox for configuration.
Next section: configuring
Read battery inverters and/or charging stations for specific configuration of this 3rd party hardware.
The FlexiObox is now ready for configuration.
You can configure the FlexiObox by clicking on the DEVICE DETAILS button.