
1. Goodwe ESA Inverter setup
1.1. Single-Phase Setup (EHA-G20 inverter)
To connect a standard GoodWe inverter, combine the 2 following items:
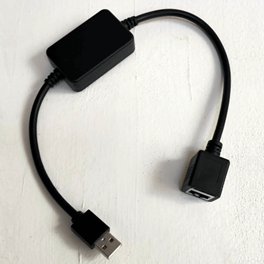
-
-
Connect one side to the GoodWe Black Dongle [LMGS] female RJ45
-
Connect the other side to the RS485/EMS port of the standard GoodWe inverter
-
-
GoodWe Black Dongle [LMGS]: plug the USB connector into one of the 4 FlexiObox USB ports
The S/FTP cable [LSF2] is sold with a length of 2 meters. Unlike UTP, S/FTP is a shielded network cable (Cat6) which ensures high quality for this type of serial connections.
Alternatively any qualitative S/FTP (Cat6 or higher) cable can be used.
Complete cabling: Inverter - SFTP - LMGS - FlexiObox
1.2. Three-Phase Setup (ETA-G20 inverter)
1.2.1. Connection on inverter side
The connection to the Goodwe ESA three-phase inverter is done by using the COM2 port on the inverter.
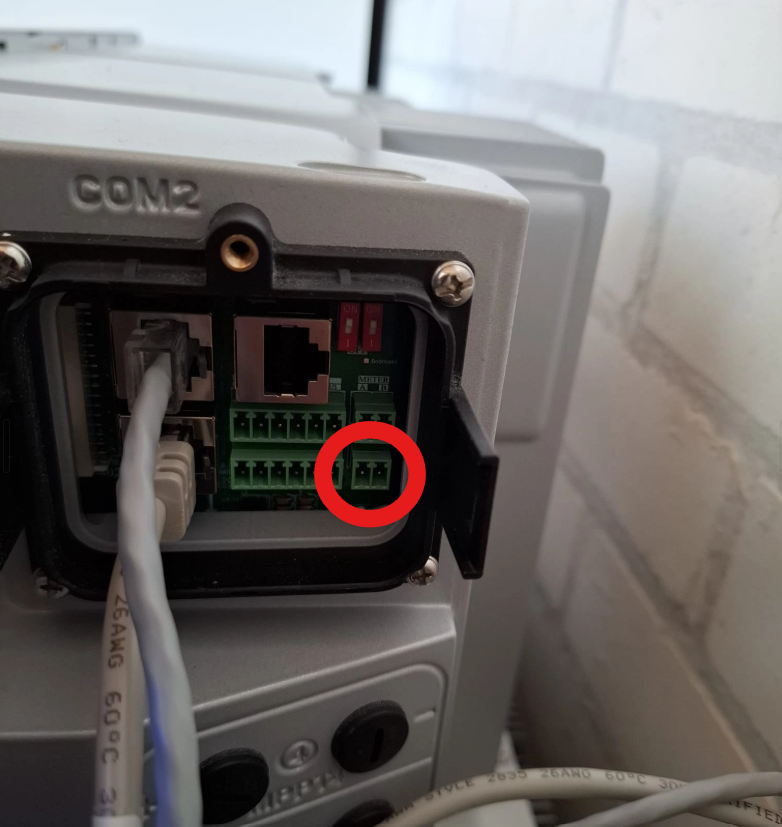
The COM2 port has multiple sections. Section G on the bottem right has to be used connecting Pin 1 and 2:
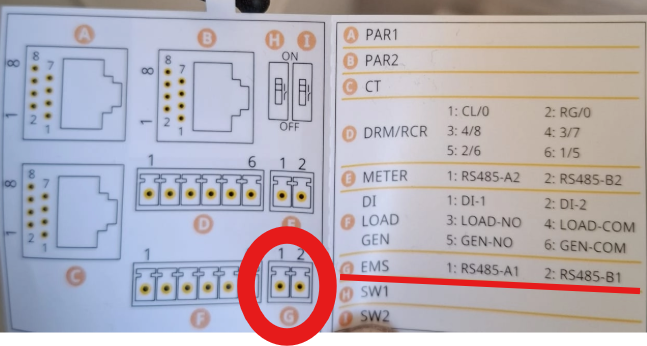
Pin 1 is used for RS485-A and Pin 2 for RS485 B. This naming is also used on the LMA1 connector used to connect to the FlexiObox.
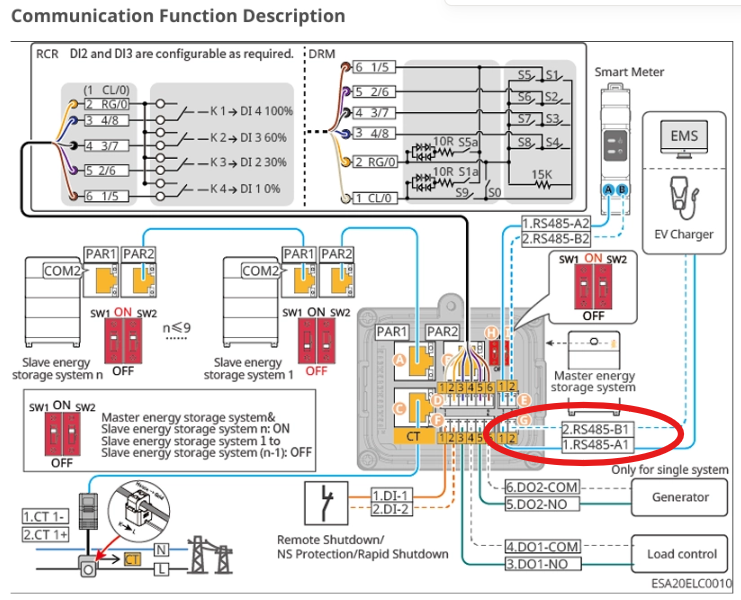
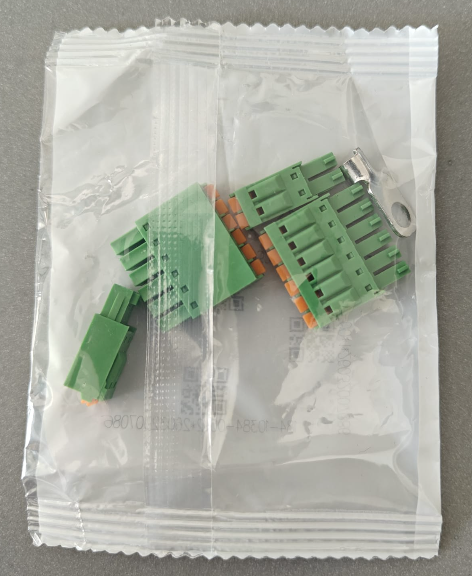
It is advised to use these green conductors to connect the cabling to Pin 1 and 2:
1.2.2. Connection on FlexiObox side
The connectors of the SFTP cable is cut on both sides. 1 side to connect to the Goodwe Pin 1 & 2. The other side of the SFTP cable is connected to the LMA1 connector. This connector is plugged in the LMGS cable which is inserted in the FlexiObox USB port.
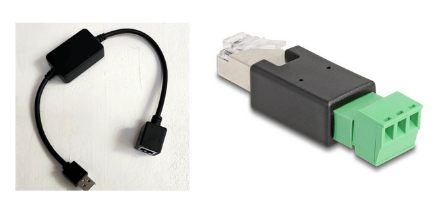
For example:
-
Blue cable from pin 1 to LMA1 pin A
-
Blue/white cable from pin 2 to LMA1 pin B
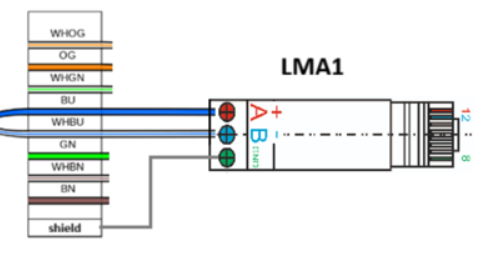
Complete cabling: Inverter - SFTP - LMA1 - LMGS - FlexiObox
Warning!
If FlexiO is chosen, the Goodwe charging station CANNOT be controlled via the inverter (solar mode), because it uses the same connector.
2. GoodWe ESA Battery Modules
The GoodWe ESA battery modules (GW5.1-BAT-D-G20, GW8.3-BAT-D-G20) contain an internal DC-DC converter. Because of this, using a standard battery configuration will overestimate the available power. Follow the steps below to configure the battery correctly.
2.1. Single-Phase Setup (EHA-G20 inverter)
-
In the installer portal, navigate to the battery configuration.
-
Select the battery type matching your module:
-
GoodWe ESA GW5.1-BAT-D Single Phase — for GW5.1-BAT-D-G20 and GW5.1-BAT-D-G21 modules
-
GoodWe ESA GW8.3-BAT-D Single Phase — for GW8.3-BAT-D-G20 and GW8.3-BAT-D-G21 modules
-
-
Set Battery Pack Count to the total number of battery modules installed.
-
All other fields are pre-configured.
2.2. Three-Phase Setup (ETA-G20 inverter)
-
In the installer portal, navigate to the battery configuration.
-
Select the battery type matching your module:
-
GoodWe ESA GW5.1-BAT-D Three Phase — for GW5.1-BAT-D-G20 and GW5.1-BAT-D-G21 modules
-
GoodWe ESA GW8.3-BAT-D Three Phase — for GW8.3-BAT-D-G20 and GW8.3-BAT-D-G21 modules
-
GoodWe ESA GW6.0-BAT-D-G20 Three Phase — for GW6.0-BAT-D-G20 modules
-
GoodWe ESA GW9.0-BAT-D-G20 Three Phase — for GW9.0-BAT-D-G20 modules
-
-
Set Battery Pack Count to the total number of battery modules installed.
-
All other fields are pre-configured.